Background

11.28.2010

Tinsel Jingle Bell Wreath

This wreath is a cute way to spice up your front door, or any door for that matter. Even better, it's REALLY EASY!!


Supplies: tinsel, craft ring, jingle bells, string, scissors (yes, you must use snowman scissors)


Step One


Step Two


Continue these steps until wreath is fully covered, and tada, you're done! Easy huh?


If you do this, send me a picture of your finished work! As always, this is available for purchase at livielovescrafts.etsy.com

11.03.2010

Mirror Image Tree Painting

I have this tree hanging in my house. It's one of my favorite handmade things I've ever done, so I thought I would share it with you guys!


This tree is surprisingly easy to make...all you need is two pieces of canvas, some spray paint, and some craft paint! I'll post a step-by-step tutorial soon =)


Also, you can buy one at LivieLovesCrafts.etsy.com!

11.01.2010

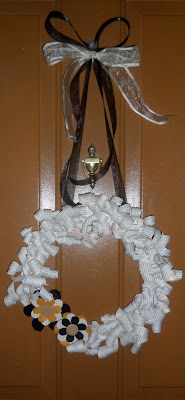
Fall Paper Wreath

Halloween is over, and it's time to start decorating the house for fall! This wreath is unique and easily customizable for any season.


Supplies:
-12" Wooden Floral & Craft Ring (the size doesn't really matter, that's just what I used)
-Book (I used an old novel from school I didn't intend to read ever again)
-Ribbon
-Hot glue gun
-Mod Podge
-Felt
-Scissors

Step 1

Tear some pages from an old book you've had lying around, but deep down you know you'll never pick up again. Cut the pages into thin strips of varying widths.


Step 2

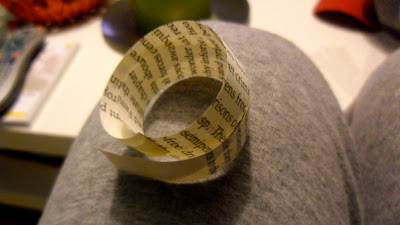
Curl the strips like you would a ribbon for a present. You will hear that familiar hollow tunnel-like sound. I found the paper is less likely to tear if you keep your scissors closed and use the dull side. Beware the dreaded paper cut!! I wrapped some tape around my finger for a little added caution.


Step 3

If your curls look a little wimpy, that's okay. Just grab the ends of the curl, twist, and pull apart. That should add a little extra bounce. Set aside a bowl or something to keep these curls from mysteriously running off the table (or in my case, being shredded to bits by kittens).


Step 4

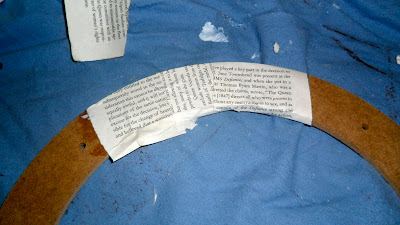
Now we need to cover the craft ring with paper, so even if there are gaps between the curls, you won't be able to tell. Cover the ring with mod podge, then tear strips of paper and wrap them around the ring. It doesn't need to look perfect my any means. Wait for the mod podge to dry then flip it over and use some more mod podge to secure any loose pieces. It's best to work one section at a time so it doesn't dry.


Step 5

Once the ring is dry, you are ready to start attaching your curly pieces. Just put a dot of hot glue on the ring, then attach a curly piece. Continue to attach pieces until your wreath has reached the desired fullness. For a fuller looking wreath, attach pieces to the back of the ring as well so they pop over the top.


Step 6 (optional)

You can embellish your wreath with flowers or something cute. I cut flowers out using my Cricut.


Step 7

Attach some ribbon to the back of your wreath, tie in a bow, and hang up your new masterpiece to show off! I used a staple gun to secure my ribbon because it has been extra windy lately.


Have fun decorating for fall everyone!


*If you don't have the supplies or the time to make a wreath of your own, I have one for sale at livielovescrafts.etsy.com!

10.25.2010

A very scary reflection, and not just because it's Monday morning!

In my opinion, the best decorations are made by transforming something that is already a part of your home decor into something holiday appropriate.

This ghastly mirror is the perfect example:

Supplies Needed:
-Mirror
-Spray glass frost (in the Christmas section)
-Glass cleaner
-Paper towels
-Black paper
-HandiTak (the sticky stuff all of your teachers used)

Step 1

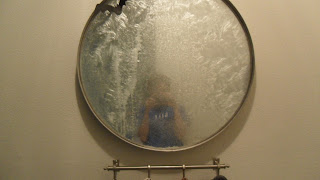
Spray the entire mirror with the glass frost. Wait 15 minutes for it to dry, then spray any areas that weren't covered enough.

I apologize in advance for the poor quality of these pictures. Photographing a mirror is never easy.


Step 2

Spray glass cleaner onto a paper towel (not onto the mirror directly), and start to trace the outline of a ghost. I found that Pledge multi surface cleaner worked best. The frost will reform a little after each time you wipe the glass. Patience is key.


Step 3

Spray a paper towel with glass cleaner, and continue to wipe away the frost. This process will go a lot faster if you use a fresh paper towel each time. The residual frost on the towel will spread if you don't.


Step 4

Cut out black paper in the shapes of two eyes and a mouth. Use the HandiTak to secure them to the mirror. Now you have a ghoulish mirror that you can still check yourself out in!


I added a bat to the top of the ghost's head to serve as a "bow"


Happy Haunting!

It's the Most FRIGHTENING Time of the Year!

Halloween is one of my favorite holidays (second only to Christmas). Here's a quick look into how I decorated my apartment for the occasion!

These are hanging over my kitchen counter.

Isn't he a cutie?

Ghosts and spider webs are a really easy way to make balcony doors look creepy.

These are my favorite addition to the Halloween Decor.
Inspired by: DIY Network


Vampire pictures! (and yes, that does say boner. Don't judge)


More vampire pictures.

Me, as a vampire baby.

I saw this Wizard of Oz reference at Michael's and just had to use it!

This is my spider guard. His name is Edwin =)

Full view of my front door.

Rawr! Monster wreath inspired by Dabbled.

Doormat from Hobby Lobby. Quite possibly my favorite place in the whole wide world.

Ghastly reflection! This shot is my favorite because the peep hole looks like a mole.
Click here for tutorial.


**Tutorials for some of these crafts coming soon**